Friday, April 18, 2014

Baby Boy Church Onesie

I find myself in the baby section of stores a lot recently looking for cutesy gifts for my friends having babies. Have you noticed how everyone is having a baby?! Seriously though, everyone! One thing I have noticed is how the little boy section doesn't have as much cute outfits (maybe it's because I love pink things and frills and that's all in the little girl section) 
Now I have no idea what babies need (I haven't even held a super young one before!) so I buy what I know: clothes. 
For my friends having little boys though, there's nothing for them to wear to church that's even kinda dressy (as dressy as you can get a baby). So I made this bow tie onesie!
Bow Ties:
The bow ties themselves were different patterns, but I'm showing the plain yellow so you can see the details clearer. I cut a big rectangle (5.5 x 7.5 inches) and a smaller rectangle (2.25 x 3.5 inches). 
Fold the big rectangle in half, length wise:
And sew a seam:
You're gonna want to pull that tube inside out so you don't see the raw edge: 
And keep the seam in the center of the tube:
Now fold the tube in half so the seam is on the outside and sew it down:
And you should have this:
Now turn that tube inside out so that you don't see the seams and you are going to iron it flat. Make sure you iron the seam like I have it below:
Now take the smaller rectangle and fold it as you would if you were making your own bias tape:
Take the big rectangle that has been ironed and fold it so it takes the shape of your bow tie:
And sew it together. I did it by hand because I don't think you can do it with the machine:
Now you are going to need snaps. I bought mine at Michaels with a coupon and they were super affordable:
Take your smaller rectangle and a set of snaps:
I poke the bottom part of the snaps through the fabric for placement and because it is way easier like that:
Then out the top snap onto the prongs sticking through the smaller rectangle and hammer it in place: 
I put the spoil ontop because that's what the package of snaps suggested in the instructions but this only lasted for one bow tie:
Once the snap is secure, wrap the small rectangle around the bow tie and see it in place
And there's your bow tie!

Onesie:
I made two onesies (I got plain white so it resembled a white shirt you would wear to church):
Mark the middle of your onesie with a pencil so you know where to put the snap. Make sure you are using the other half of the snap! I used the flat part for all the bow tie and the knob on the onesie. Also, I cut a piece of felt the size of a quarter to add to make the snap more sturdy:
Place the felt on the inside of the onesie so you can't see it: 
And stick the prongs of the snap through:
Now you are definitely going to need the spool. Match the hole of the spool and put that over the knob so it doesn't damage when you hammer it down:
And your snap is in place!

And your little man is now ready for church!


Here's the deal with the snaps though: I don't trust them all too much! I love Michaels craft supplies but there have been times that I followed instructions exactly and it didn't work perfectly. So even though I did what the instructions say for the snaps, I still take them off super carefully. When taking off a bow tie, I put my nail in between the gap of the snaps and help it separate:
That way you don't rip them off, and you can prolong the life of the snaps (until your little dude outgrows the onesie)


So I sent these off with my mother in law who was heading to Alberta to see my new cutie patootie nephew with a few other little things too!


I knitted this bow tie bib that you can find here!

 And I made something still for baby, but cute for mommy to carry around: a diaper clutch that fit 4 diapers, bum cream, wet wipes, and a plush diaper mat (because those hard plastic change stations don't look clean or comfy)
I was going to do a DIY on the diaper clutch but I seriously had no idea what I was doing! Buying the bum cream alone took about 30 minutes because I had no idea what to get (and there are SO many options!) And the diapers were a whole other story (why are there so many different types?!) 

Valentines day surprise!

This year for Valentines Day, we wanted to keep it low key so we had a nice dinner together but I wanted to do something for Ian. While he was at work, I took the extra set of keys to our car and did some re-decorating to the inside. 
First he got a "ticket":
 

Then he got the cheesiest nerdy valentines cards I could find:


Since I was going to get him to check out his car at his lunch so the ticket didn't fly away, I got him a little treat from Tim Hortons that was very hard not to eat:

The nerdy valentines were very specific to him because we both love Harry Potter, he loves Star Wars, and I love super heros. The Star Trek ones were there because I always joke that it's better than Star Wars and the transformer ones are there because I always make Optimus Prime jokes whenever I see a truck on the road. 
Turns out Ian loved the surprise and he even kept one of the Valentine cards in the car to remind him!

Happy Valentines Day!!!

Wednesday, March 5, 2014

Apple Blossom Recipe

I have been seeing pictures everywhere of this apple pie with no top and the apples looking like a flower blossom. It looks so gorgeous that I thought it would take a pastry chef to accomplish but guess who took it on tonight... This girl!! Here's the photo how-to!
CRUST
1 1/4 cups flour
1 tbsp sugar
1/2 tsp salt
1/4 cup butter
3 tbsp shortening
3tbsp cold water
*Combine all ingredients and roll the dough out to fit into a 9 inch pie dish
*Once the pie crust is in the plate, put into the oven (350 degrees) for 10 minutes 

BLOSSOM
Apples!! (the amount really depends on the size of the apples but I used 5)
2/3 cup brown sugar
1 tbsp flour
1 1/4 tsp ground cinnamon 
1/4 tsp nutmeg
3 tbsp vanilla extract 
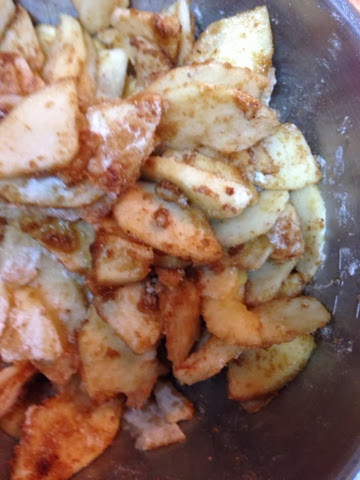
*The first (and most annoying) thing you have to do is peel and slice the apples. The easiest way that I have seen online is to slice them in a mandolin, but I don't have one so I had to slice by hand. It is SO important to keep the slices super thin so they look like delicate petals and so they bend easier
*Combine all ingredients with the apples and mix with your hands. Be super gentle because those really thin slices break very easily
*Now for the tricky part: starting on the outside rim of the pie crust, place the slices in an outline. Once the rim. Is outlined, start on the next round and keep going until you get to the middle and you will notice you made a flower!! Ta-da!!!
*With the oven at 350 degrees, bake the pie for 30 minutes (the crust is already done so this is mainly for the apple slices)
Once the pie is done, the house smelled amazing! And the pie itself looked pretty cute too!!
So by this point, I was happy with my recipe, and the look of the pie but now I had to serve it and this part always gets messy for me. Whenever I serve a regular pie, the crust breaks into pieces and the filling gushes out and the presentation of the slice of pie looks super messy! The biggest surprise of this pie was how easily it serves!!
This pie was SO great with the look, taste and (surprise!) how easily it serves, I even took a make up free picture of moi with my gorgeous slice! :p
The best review for the apple blossom was from my dad when he didn't think I could hear him. He told my husband Ian that it was "the best pie he ever had". With a perfect ratio consisting of lots of apple and not too much dough, this blossom is a winner!!!

Brave Recipe!

I have been trying to get Ian to watch the movie Brave since it came out! So when he suggested watching it on Sunday, I jumped at the chance, especially because he has been doing a Suits marathon for the past week and any change was totally appreciated. After watching it and wanting those little cakes the brothers kept eating, I made them and a tutorial video the next day :)


RECIPE
Cakes:
¼ cup milk
 3 eggs
 ¾ cup sugar
½ cup softened butter
3 cups flour, I know it sounds like a lot but you won’t end up using all of it
A pinch salt
 2 TBSP vanilla extract
 1 TBSP baking powder

Mix butter and sugar together.
When fully combined, add milk, eggs, vanilla extract and mix until fully combined.
Then add baking powder,  salt, and here's where the flour is added in small increments. Mix it all together, slowly adding more flour until you get a batter forming. 
Scoop batter onto lined baking pan with an ice cream scooper.
350 degrees for 8 minutes

Glaze:
1 cup icing sugar
1 tbsp water
Mix together until a glaze is formed and drop onto the center of each cake.

Top with a half cherry and enjoy!

Monday, January 20, 2014

DIY Haircut!!

Ian has been asking me since we were dating if I would cut his hair and I was always way too scared to even try it. Well after doing the math, one years worth of Ian's hair cuts could equal one pair of shoes from Aldo so I learned pretty quickly. I looked everywhere for a great tutorial and I ended up using only one (http://youtu.be/bGxG1l4z4wU).
Here's some before photos of Ian in our washroom looking WAY too calm for someone about to get a haircut from their wife who only googled it.
 I did the first part of the haircut with the electric razed and it was so easy, I thought this was going to be a breeze!
Then I soaked his hair, got out the scissors and started realizing that it was harder than I thought. I texted Caitlin whole I was doing the haircut (multitasking!!) and here's what our conversation looked like (I typo-ed ear with war):
Near the end of the haircut, Ian wanted me to trim around his ear and that's where he said the quote of the night "it's just hair, it will grow back eventually". All in all, I'm pretty ok with how the haircut turned out for it being my first time trying it. Here's the after shots:
So glad it's over and my payment: Menchie's (and shoes later on)!!!!