Tuesday, April 30, 2013

My first dress!!!!!


So I have always wanted to learn to sew and make dresses for myself but I had no idea how to read the patterns. Every time I get a pattern, I cut the pieces then turn to the instructions and think they totally made a mistake. The instructions weren't to make a dress but looked more like instructions to build a spaceship! Well my sister in law is moving to Alberta and I wanted to get her something for her to remember me by but I couldn't find a modest dress that looked cute. Then I remembered the spaceship/dress pattern that I had.
After deciding to make this dress, I went with Ian to Fabricland to find the perfect material but it was WAY harder than I thought. 2 hours later, we settled on a yellow floral pattern (Lauren had told us she liked floral and yellow was her wedding colour so it seemed like a safe bet).
   After a lot of mistakes including sewing my own shirt to the dress, it was done!
After taking the dress in to fit the measurements and adding trim to the neckline because it showed WAY too much of the girls, I was FINALLY done my first ever dress!
I made a wire name tag, cute tag for the inside of the dress, and painted a gift box green to put it in and voila! Ready to go!


Saturday, April 20, 2013

72 Hour Kit: Face Off

Today at church we had an emergency preparedness activity where we learned all about being prepared on case of an emergency. Part of the activity was to bring your 72 hour kit to be judged for a prize. So while I was in the kitchen in charge of the food for the activity, my mom was pretty much selling her kit to the judges. Long story short: she won and I think mine is way better. So now I am leaving it up to you guys! I will post the picture of each bag and a description of what is in the bag under it. I won't say any names to keep it fair and at the bottom is the poll.

BAG A:

*Gym Duffle Bag. *prescription drugs     *complete change of clothes    *flashlight.    *polysporin
*yoyo. *toilet paper  *sudoku book. *pads   *book of Mormon. *water   *deodorant *towel
*perfume. * tooth paste   *advil. * floss. *stand for something book   *purell. * tooth brush     
*manicure set. * wet wipes   *id documents. *cash   *reading glasses. *hand lotion  
*church documents. * 2 cans soup   *1 can ravioli. * 2 cans tuna. *1 can peaches. *dries mangos.
*2 pudding cups. *plastic fork a d knife. * glow stick


BAG B:

*backpack. * whistle. *fleece blanket. *2 plastic sheets. *complete Change of clothes. *plastic mug. *toilet paper. *rope. * hunting knife. *3 sizes of rolled bandages. *church documents on USB.
*glow stick. *4 packs waterproof matches. *prescription drugs. *chapstick. *metal cutlery. *purell *eye drops. *toothbrush. *toothpaste. *flashlight . *hair bands Nd bobby pins. *deodorant. *sunscreen. *gauze packs. *advil. *latex gloves. *tweezers. *tums. * mini splint. * medical tape.
* band aids. *pads. *2 chocolate bars. *3 cans raviolis *3 cans peaches *3 fruit bars. * 3 granola bars. * 3 apple juice boxes. *3 packs instant oatmeal *candy *water. *id documents. *cash. *Sling shot *magazine


Tuesday, April 9, 2013

Nutella Cookies!

Since joining Pinterest, I have found MANY awesome little ideas that I will probably never do but I can dream right? This was my first ever food 'pin' that I swore I could do because it looked SO easy! Who knew that I would complete the wedding pins before the simple cookie pin!
On Easter weekend, Ian and I went to Whitby where I got the cutest measuring cups from my mother in law, Heather (Thanks Heather!!) and she also bought us two giant tubs of Nutella so it was obvious what the first thing I was going to do when I got home would be.  So after I ate half a tub of Nutella straight out of the jar (I'm totally kidding! I only had one spoon....ish) I made Nutella cookies!
Here's how I (FINALLY) made the Nutella Cookies:

 First off, here are the super cute measuring cups!
 They even stack together perfectly!
Anyhoo, here's how I made the cookies:
 1 cup of Nutella (you will probably need more for snacking)
 1 egg (the egg holder is totally a MUST!....
just kidding but make sure the egg is at room temperature)
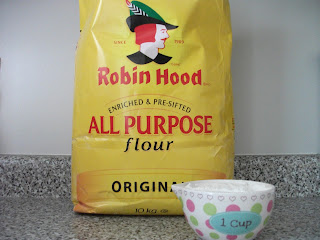
 1 cup flour
(can you tell we are working on our food storage
because of the huge sizes of everything I am using!)
 Mix everything together in a bowl very neatly, using a spoon
 The 'very neatly, using a spoon' lasted maybe 30 seconds before I got my hands in there
 Make sure you heat up the oven to 350 degrees

When you have a uniform batter mix, make 1 inch balls and place onto the baking sheet

 Now you have to squish the balls flat using a glass

 They grow a little bit so make sure there is some room between them
Bake them for 6 minutes and dont eat the right when you take them out because you WILL burn your mouth (I learned the hard way!)

TA-DA! Nutella cookies!

Monday, April 8, 2013

Mom's Birthday!

April 3rd was my mom's birthday and I wanted to make her cake. Since she loves ballet so much, I made her a ballerina jewelry box cake with her favourite gourmet chocolate cake recipe. She learned how to make this cake from Bonnie Gordon (Toronto's best cake designer) and I borrowed her recipe. Based off of this experience with a gourmet cake, I'm sticking to boxed cakes :p. I thought it would be so easy because my mom makes them for us all the time (she even made my aunt's 4 tier wedding cake, no problemo). It didn't turn out exactly as I wanted but that cake was SO yummy! Happy Birthday Mommy!!


Monday, April 1, 2013

The Easter Cake Story!!!

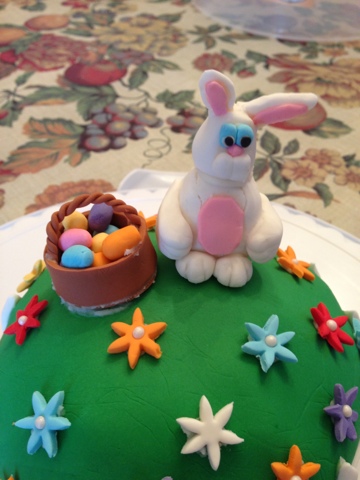
So I have been on Pinterest looking up ideas for cute Easter-ish dishes to bring to my mother in law's house. After ruling out bringing a cooked lamb (definitely not going to happen!) I went with a cake. The inside was plain vanilla but I did a tie die effect that I had seen on 9gag and didn't know if it would work. After dividing the batter and dying it, I started to pour them into the cake pan when my heart stopped. The colours were blending! We were going to cut into a cute Easter cake and instead of bright Easter colours, it was going to look like brown mush cake :(. Thinking that my cake was going to look like poop (literally) when served, I had to up my game on the cuteness of the cake. I covered the cake with green fondant for the grass and put up the dumb white picket fence (I whipped out a ruler and made sure everything was friggin perfect for that fence). That's when the tough part started: the Easter bunny. I finished what I thought would be impossible in half an hour. This was WAY too good to be true! I spent the rest of my night watching Harry Potter with my hubby, knowing my bunny would be dry in the morning and the cake could be finished just in time. You know how I say 'don't jinx it'? This is a perfect example of why you shouldn't open your mouth before something is completed. The next morning, my mom decided she wanted to take a picture of the bunny so she picked it up and turned the Easter bunny into the Liberty Bell! There was a huge crack down the middle of my bunny!!!! At this point I just wanted to turn into the Hulk and smash something because I was SO proud of this cake. I got over it and put the cake together and on the traveller case to take to Whitby. I got things ready to go and my super helpful hubby Ian put the top onto the caddy when I hear 'oh crap!! I'm so sorry!' The Easter bunny had joined the ranks of Vincent Van Gough and had lost his ear. At this point I wanted to take the cake and smash it into the wall but we had to get on the road so we just left and I finished it there. That poor bunny had a rough life but it made it to its final destination in time. Oh, the tie die effect ended up working perfectly too but next year, I might just make a pie:)